Saturday, November 29, 2014

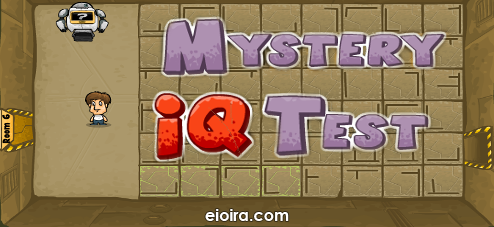
Mystery IQ Test Walkthrough Guide

Deepest Sleep
The Deepest Sleep Logo

Play Online: The Deepest Sleep
Developer: EntertainmentForge
Genre: Puzzle

The Deepest Sleep Guide
Solutions to Mystery IQ Test
1. Go through door no. 3 (the number of triangles in the picture).
2. Walk on the tiles marked 20, 19, 18 etc. to 0.
3. When the cage falls on you, press the [shift] key, then walk through the door.
4. Take the tile with four horizontal lines and put it in the slot, then walk through the door.
5. Take the tile with a dot on it, put it in the slot, exit.
6. Walk on the tiles that follow the same pattern as the four green ones at the start of the maze.
7. Take the tile marked anything other than 8 and put them in the slot.
8. Go straight through to the next room, then go up into the next room, then go left. Pull the first and the third lever, go right, remember the order of the pictures .on the stones. Go down, change the order to match the one on the stones.
9. Press the right arrow key when the arrow on the screen is straight, and the left key when the arrow is circular, until you reach the door.
10. Go through door no. 1.
11. Put the box on one button. Take the cheese near the hole and wait for the mouse to come out. Put the cheese on the other button, the mouse will follow. When the mouse steps on the other button, exit.
12. Click on the door with your mouse.
13. Take the tile with the 90 degree angle pointing left (the tile nearest the robot) and put it in the left slot. Take the tile with a sharp angle pointing right into the slot on the right.
14. Go through the door marked 15 (number not divisible by 6).
15. Go through door no. 4 (last letters of each line spell out "four").
16. Press [space] when you reach the bar with 2013 on it, then move along with it to the door.
17. Walk to the opposite wall, in the lower half of it there is an invisible door, go through it.
18. Take the tile with one dot on the top and two in the middle on opposite sides, put it in the slot, the window will open and show the number 3. Go through door no. 3.
19. Go through the lowest door.
20. Start from the tile marked 0, then 1, 2 until 7, then 6, 5 until 1 at the door. Alternatively, start at 16, then 15, 14 and so on until 1 at the door.
21. Take the tile nearest to you (the one that looks like a clock showing 12:25), put it in the slot, then walk on the tiles which spell out "emitemit".
22. Write with your keyboard "Mystery IQ Test".
23. Take the tile showing one horizontal line and one line going from the top right corner to the lower left, put it in the slot. Take another tile and put it on the button. Walk on the tiles repeating the pattern of the four green ones.
24. Go through door marked 16 (the number of triangles).
25. Put tiles numbered 4, 3, 2, and 1 in the slots in that order, then walk on the tiles marked "43214321".
26. Take the tile with one horizontal line at the top, place it in the slot.
27. Take the tile with the number 9, put it in the slot, then walk on tiles that spell out "Darkdark".
28. Start from the fourth tile from the top, then right, down, down, right, right, up, right, up, up, right, up, right and out the door.
29. Go through door number 3 (the number of times the screen flickers).
30. Go through door number 1.

Saturday, November 22, 2014

Viking Valor Walkthrough Guide

Viking Valor
Viking Valor Logo

Play Online: Viking Valor
Developer: HighUpStudio
Genre: Defense, Shooter

Viking Valor Guide
List of Skills in Viking Valor
Cannons
Grizzly Gremlin - The standard cannon every sailor needs.
> Damage Upgrade: Increase the damage of this cannon.
Damage: 20 / 25 / 35 / 45 / 60 / 70
> Cooldown Upgrade: Decrease the cooldown of this cannon.
Cooldown: 1.8 / 1.7 / 1.6 / 1.4 / 1.2 / 1 sec

Rounded Regina - Known as the Queen of Cannons, she will lead you to victory!
> Damage Upgrade: Increase the damage of this cannon.
Damage: 70 / 80 / 90 / 100 / 120 / 150
> Cooldown Upgrade: Decrease the cooldown of this cannon.
Cooldown: 2.5 / 2.3 / 2 / 1.7 / 1.4 / 1 sec

Gentle Gemini - Two is better than one and is far from gentle!
> Damage Upgrade: Increase the damage of this cannon.
Damage: 30 / 45 / 60 / 75 / 90 / 100
> Cooldown Upgrade: Decrease the cooldown of this cannon.
Cooldown: 2.3 / 2 / 1.7 / 1.3 / 1 / 0.7 sec

Evacuator - Leads to people evacuating in more ways than one.
> Damage Upgrade: Increase the damage of this cannon.
Damage: 100 / 160 / 220 / 280 / 350 / 500
> Cooldown Upgrade: Decrease the cooldown of this cannon.
Cooldown: 4 / 3.5 / 3 / 2.5 / 2 / 1.4 sec

Trusty Cannoneers I - Your crewman will fire at all to defend their captains ship!
> Gunner Upgrade: Increase the damage and fire rate of your gunners.
Damage: 20 / 40 / 60 / 80 / 100 / 120 / 150
Cooldown: 7.5 / 7 / 6.5 / 6 / 5.5 / 5 / 4.5 sec

Trusty Cannoneers II - Your crewman will fire at all to defend their captains ship!
> Gunner Upgrade: Increase the damage and fire rate of your gunners.
Damage: 20 / 40 / 60 / 80 / 100 / 120 / 150
Cooldown: 7.5 / 7 / 6.5 / 6 / 5.5 / 5 / 4.5 sec

Upgrades
Cannon Ball - Cannon deals 15% more damage.
> Duck Hunt - Cannon does 30% more damage against flying enemies.
> Ground Locked - Cannon does 20% more damage against ground enemies.

Pumping Iron - Increase Trusty Cannoneers damage by 20 %.
> Lightning Fast - Increase Trusty Cannoneers fire-rate by 20 %.

Juggernaut - Increase ships health by 400.
> Raise the shields - Take 15% less damage from projectiles.
> Puny Weapons - Take 8% less damage from melee attacks.

Spells
Hammer of Thor - Hurl lightning from the sky upon your enemies.
Damage: 200, Cooldown: 60 sec
> Damage Upgrade - Deal 60 % more damage.
> Cooldown Upgrade - Reduce cooldown by 20 %.

Draugr's Gift - Hail meteor from the god Draugr to the earth.
Damage: 100 per meteor, Cooldown: 100 sec
> Damage Upgrade - Deal 80 % more damage.
> Cooldown Upgrade - Reduce cooldown by 40 %.

Skadi's Reckoning - Rain shards of ice upon your enemies.
Damage: 20 per ice shard, Slow: 40 %. Cooldown: 75 sec
> Damage Upgrade - Deal 100 % more damage.
> Cooldown Upgrade - Reduce cooldown by 60 %.

List of Traps in Viking Valor
Spikes - Spiked planks that cause damage to enemies as they walk across it.
> Spikes Upgrade
Damage: 15 / 30 / 40

Horn Blower - Powerful wind turbine that slows enemies.
> Horn Blower Upgrade
Slow: 42 / 56 / 70 %

Dynamite - Stick of pure badassery, it will make all nearby enemies explose!
> Dynamite Upgrade
Damage: 180 / 300 / 500

Hog Grill - The intense fire from the grill will burn all enemies walking over it.
> Hog Grill Upgrade
Burn: 15 / 21 / 27 per sec, Duration: 2 sec

Spring Board - Launches the enemies backward, what more would you need?
> Spring Board Upgrade
Knockback: 2 meter, Cooldown: 8 / 5 / 3 sec

Fireball Pipes - Shoots 4 firefballs out of its tubes, causing damage on hit and damage over time.
> Fireball Pipes Upgrade
Damage: 15 / 30 / 50, Burn: 9 / 15 / 21 per sec, Duration: 2 sec

Tesla Coil - Nikola Tesla told us it releases a burst of electricity, damage all nearby units, land and air alike.
> Tesla Coil Upgrade
Damage: 30 / 50 / 70, Cooldown: 12 / 11 / 10 sec

Recommended Build for Viking Valor
Skills
1. Max Grizzly Gremlin
2. Max Rounded Regina
3. Cannon Ball
4. Ground Locked
5. Duck Hunt
6. Max Evacuator
7. Trusty Cannoneers I
8. Trusty Cannoneers II
9. Pumping Iron
10. Lightning Fast
11. Max Draugr's Gift
12. Max Hammer of Thor
13. Max Skadi's Reckoning
14. Juggernaut
15. Raise the shields
16. Puny Weapons

Traps
1. Max Horn Blower
2. Max Fireball Pipes
3. Max Dynamite

Viking Valor walkthrough
Viking Valor is not terribly long or difficult, but I felt it was a little grinding. New cannons seem to be downgrades every time, until I spend several level's worth of points to make it better. By that time, the next cannon is already unlocked. That's why I skipped buying Gentle Gemini in my build above. Just remember to set your priorities right by aiming those quicker enemies, and you should be fine until facing the last boss. For the last boss, my trap layout are Horn Blower, Fireball Pipes, Fireball Pipes, Horn Blower, Fireball Pipes, Fireball Pipes, Horn Blower, Fireball Pipes, Fireball Pipes. The boss didn't even make it to the ship to deal any damage. Easy game! :P

Saturday, November 15, 2014

Idle Tree Walkthrough Guide

Idle Tree
Idle Tree Logo

Play Online: Idle Tree
Developer: KingsWill
Genre: Upgrades, Simulation

Idle Tree Guide
List of Upgrades in Idle Tree
Manual Fighter
1. Upgrade Tree
2. Upgrade Click's Strength
3. Upgrade Manual-Click Fighter

Auto Fighter
1. Upgrade Fighter's Speed
2. Upgrade Fighter's Strength
3. Upgrade Auto-Click Fighter

List of Trees in Idle Tree
- Sapling
- Young Tree
- Tree
- Autumn Tree
- Spooky Tree
- Tree of Souls
- Christmas Tree
- Palm Tree
- Bonsai
- Jack's Beanstalk
- White Tree of Gondor
- Truffula Tree
- Burning Tree
- Yggdrasil
- Mario 64 Tree
- Minecraft Tree
- Whomping Willow
- Swamp Tree
- Giant Mushroom
- Ent
- Space Tree
- Cable Tree
- Cherry Blossom Tree
- Cacti
- Kite eating Tree
- Grandmother Willow
- Bambus
- Family Tree
- Great Deku Tree
- Mana Tree

List of Coins in Idle Tree
- Bronze (one, 1)
- Silver (thousand, k)
- Gold (million, m)
- Platinum [cyan] (billion, b)
- Ruby [red] (trillion, t)
- Amethyst [purple] (quadrillion, q)
- Emerald [green] (quintillion, qt)
- Rose [pink] (sextillion, s)
- Sapphire [blue] (septillion, sp)
- Diamond [white] (octillion, o)
- Onyx [black] (nonillion, n)
- Rainbow (decillion, dc)
- Unobtainium [gold-green] (undecillion, u)

Idle Tree Walkthrough
The fastest way for me to win Idle Tree is to buy all the 4 Auto-Click Fighters first. Once you have all 4 of them, you can start to concentrate and put all your gold onto one fighter. Normally, I will upgrade 2 times Fighter's Speed then 1 time Fighter's Strength. So, you should always have like 10 Fighter's Speed maxed and 5 Fighter's Strength. Once you are done, buy the remaining Fighter's Strength then upgrade your Auto-Click Fighter. Now, repeat the process until you win the game. Remember to upgrade your tree every time you can. Basically, this method seems to work fairly for me. The logic behind is you are gaining more idle clicks first because every time you upgrade your Auto-Click Fighter, the speed will fall back to level 1. Instead of increasing the amount of gold you are earning, I focus on gaining the amount of auto-clicks first. That's why I went for speed over strength. Please comment below if you have tried going for strength over speed first. :)

Pro-Tip: You keep the left mouse button pressed and simultaneously keep pressing right mouse button and space-bar you can generate 3 times the money!

Friday, November 14, 2014

How To Be a Gamer: Find a Good Place

Find a Good Place
Now that you have your system and games, you must find a good place to play them. An area where you can comfortably sit for hours on end is a must. You absolutely will not like people to disturb you when you are halfway through the games. Also, asking you to quit your important game so they can watch TV. Choosing a good place to play games is quite essential for gamers. An ideal room set up for gamers should balance comfort with an assortment of technologies to make longer sessions gaming satisfying. Below are some places you may consider playing at...

1. Bedroom
2. Living room
3. Garage
4. Basement
5. LAN gaming centers
6. Community clubs
7. Office
8. Game Shop

For me, I mostly play at home and my bedroom is my man cave. Basically, my room is equipped with my gaming computer, media devices such as mini stereo set and television (which I used to have). I can really spend a full 4-5 hours in my room doing my own stuff and not step out. For PC, I have a desk to work on. My smartphone or handheld will be my bed most of the time. And for consoles, not any more sadly. I just throw away my old television, but every now and then I take one of my consoles to the living room and play there. Simply put that my room is a place where "I can do anything as I please"; I eat, play and sleep here. What is kind of funny is I am always protective of my bedroom, but either way nobody goes in there. It is really my own room, my own space! You can enter only with my permission!

I've tried playing in LAN centers for long period of time but it just didn't feel right. I just couldn't get comfortable at LAN centers for too long. Firstly, I have to buy food when I hungry, have to walk quite a distance to toilet and stuff like that. Secondly, it's quite an expense to my pocket especially for a student like me. However it can be quite an experience, if you have friends tagging along with you to LAN centers playing co-op and MOBA games. Yeah! Generally I prefer playing at home and I really quite happy with my current setup. As long you feel comfortable with the environment, I think that will a good place to play all your games. Now, tell us where do you game below the comments below!

Saturday, November 8, 2014

A Temple of Two Worlds Walkthrough Guide

A Temple of Two Worlds
A Temple of Two Worlds Logo

Play Online: A Temple of Two Worlds
Developer: Storm Alligator
Genre: Adventure

A Temple of Two Worlds Guide
Solutions to A Temple of Two Worlds
1. Go to Morbert’s computer. Read the returned letter.
- You get the name of their boss : Neil Abrew.

2. Go to the report station. It asks you for the author. Type "Neil Abrew".
- You get Neil’s HomeworldCom ID.

3. Go to the HomeworldCom computer. Type "Mirror1”.
- You get Neil’s password.

4. Go to Neil’s computer. Open the Chat app.
Type first name: "Neil", Password "qwerty55”.
- You learn that Neil will use a Diary app.

5. Go to Zatricia’s computer. Open Search app. Type "MySimpleDiary". Then type first name: "Neil". Password: "qwerty55″.
- You learn that Neil will talk to the team in the lounge on the 61th day of DeltaMonth at C hour.

6. Go to the Surveillance Computer. On the manuel, it says that the camera of the lounge is E3 and how to format the date search. Click "Surveillance". Type "E3″ for Camera and "61C" for date.
- You learn Morbert’s password.

7. Go to Morbert’s computer. Open the chat app. Type first name: "Morbert". Password: "lovebartha".
- You learn tha Morbert will plant a bomb on the machine room on the 91th day of DeltaMonth at G hour.

8. Go to the Camera computer. Click "Surveillance". If you type E4 as Camera ID, you’ll learn that the camera was destroyed. Since we can’t access the camera of the machine room, we will try the one of the machine room-lounge corridor.
Type "E5″ for Camera and "91G" for date.
- You learn Zatricia’s password.

9. Go to Zatricia’s computer. Open Search app. Type: "MySimpleDiary". Then type first name: "Zatricia". Password: "distantuniverse".
- You learn that the team has had a meeting in the lounge on the 95th day of DeltaMonth at Y hour.

10. Go to the Camera computer. Click "Surveillance". Type "E3″ for Camera and "95Y" for date.
- You learn Zatricia’s full name.

11. Go to the report station. "Type Zatricia Taylor Abrew".
- You learn that the password for the computer in the machine room is the name of Zatricia’s daughter if she had been born in Homeworld. By now you must have figured out that Pauline is Neil and Zatricia’s daughter. Her first name would become Zauline and her last name is Taylor Abrew.

12. Go to the computer in the machine room. Type "Zauline Taylor Abrew".
Ending #1: Hit "Confirm" on the computer.
Ending #2: Close the computer and go to the teleporter.

Friday, November 7, 2014

How To Be a Gamer: Picking An Awesome Username

Picking An Awesome Username
Are professional gamers good because they're good, or just because their usernames make you think they are? In my opinion, it may actually be a little bit of both. Sure, they are professional gamers, but I feel that it's their username that gives them the identity and profile. You will feel good when players recognize you by your username. It feels like an achievement unlocked, that's why good usernames are part of what makes games fun and entertaining.

Honestly, choosing a username can be either one of the easiest or hardest things to do before you play a new game. Sometimes you already have your identity from a previous game. So the decision is already made. You also might need to change your name if you change game genres because the name doesn’t quite fit or someone else has your name, but lets take a look at some ways of picking a great username.

Once you choose a username you’re stuck with it
Not all games always give you the option to change your username, they normally tie your account to your username forever. Of course, you always have the option to register and create a new account later on, but if you do that you'll be starting completely from scratch with a brand new gaming profile. If you plan to play the game indefinitely, you’ll be stuck with this name for the long haul. For this reason, take the time to put some thought into your gaming username.

Choose a name that’s easy for people to remember
When you create your username in games, you should try to choose something that’s easy for people to remember. Use familiar words instead of gibberish (or if you do use a made-up word make sure it’s easy to remember how to spell it). Don’t forget that what’s easy for you to remember may not be easy for others to remember. Try to use something simple that you feel describes yourself.

Use capital letters to separate words
If your gaming account name is made up of several words, then you should use capital letters to separate the words. This makes it easier on the eye and easier to read.

Example, TripleKill easier to read than triplekill? Or another example, isn’t FlyingThunderGod easier to read than flyingthundergod? Keep this in mind that, when you sign up for your account, you’ll want to make sure to type your username selection in with the capital letters as you won’t be able to go back and change this later.

Pick something personal and unique
The best usernames are always personal and unique; something no one else would think of. Avoid clichés and check around the Internet before you pick. Chances are, if it’s taken, then it’s not as clever as you think. Just be creative and pick a different phonetic spelling, keep exploring until you found something you really like!

Don't randomly mash keys because you can’t think of anything
I know this one is easy to do, but you’re going to look pretty ridiculous with a name like Jea61bbzx or h78bjhasd1! Just don't do it.

Don't put "X" or "O" or numbers around everything
Adding "X" or "O" or numbers to the end of your name that don't belong or have no purpose really makes you look like a noob/baddie/wannabe. That sounds harsh, but when you online its true, why would I ever want to talk to someone named dragon192384 or xxdragonboy1993? The Internet seems to think this way. Don’t do this. It’s not cool and too many people have already gone down this path.

Avoid usernames of the last kind
There is one more popular username that doesn't work in most games. This will however work on forums, IRC chats, and similar type places. We are of course talking about Emoticons and usernames made up of symbols. Examples of the best are: ^.^, q [-_-] p, <(-. -) >, <(+_+) >, {=. =}... Stay away, this is definitely a no no!

Use random username generator online
This should be your last resort... Only when you're unable to come up with a name, try searching in a search engine for a name generator. There are plenty of them out there with some funny results that could help you on your way. Just be think carefully when picking any names, because name generated are normally not unique. They are all random words mixed together to form your usernames.

Never copy other people names
Professionals have simple names, such as: "Fatal1ty", "spawn", "heaton", "HotshotGG", "Faker". Do not copy their ussernames, people will dislike you if you use the same name as a professional and play on public servers. Players might report you and may cause your account to be terminated. Just be creative and unique, choose your very own username.

There you have it. Follow these rules, and you’ll be on your way to possessing a username that doesn’t completely suck. Who knows, you might even come up with. Hopefully this helps you pick the type of username you want. It's worth the time and effort to pick one you will be happy with so you don't need to change it or start a new account at some point.

Saturday, November 1, 2014

Escape from Jay is Games Walkthrough Guide

Escape from Jay is Games
Escape from Jay is Games Logo

Play Online: Escape from Jay is Games
Developer: Mateusz Skutnik
Genre: Puzzle

Escape from Jay is Games Guide
Solutions to Escape from Jay is Games
To complete the game, you have to collect four reptilian limps and a valve, and then use them all over the main entrance in the room.
Starting scene: The scene you start in.
Bed scene: The scene with the stone statue in the bed.
Main entrance scene: The scene with a door full of golden sand.
Junkyard scene: The scene with old and broken machines.

Limb 1:
- Open the lowermost drawer in the bed scene. (Lower left) Get the knife and turn right twice to the junkyard scene. Use the knife in the leftmost coin slot, and get the coin. Turn back to the bed scene, and put the coin in the piggy bank. (Middle left) Get the reptilian limb.

Limb 2:
- Grab the floor brush in the lower left of the main entrance scene.
- Pick up the transistor in the junkyard scene (on the floor between the two middle machines), and put it on top of the machine in the starting scene. Pull the lever, and wait for the "welcome" sound. Click on the screen and on both green switches to open up two buttons in the starting scene. (upper left) Push the right one of them.
- Turn right to the bed scene, and enter the hole in the wall. Use the floor brush on the reptilian limb in the lower right, and click on it to pick it up.

Limb 3:
- Push the red book lying on the other books on the bokkshelf in the starting scene. (Upper right) Get the note that falls out.
- Zoom in on the chalk board on the left part of the starting scene, and use the note to get a 5-number code. The code changes every time you play.

*The code*
- For example, 5 means the fifth number counted from upper left, and red left to right, top to bottom.
1 2 3 4 5 6 7 8 9 10
11 12 13 14 15 16 17 18 19 20
21 22 23 24 25 26 27 28 29 30
...

Limb 4:
- In the bed scene, push all red pillows once to reveal a key. Use it on the chest in the upper right of the main entrance scene to get a mahogny eye.
- Push the left button in the upper left of the starting scene. (If you can't push it because it has a cover on it, see "limb 2" to find out about how to open it.)
- Turn left to the junkyard scene, and get the mahogny eye from the hole in the wall. Turn left to the main entrance scene.
- Put both eyes in the strange statue in the upper left. Get the reptilian limb.

Valve:
- In the bed scene, click the valve in the middle right part of the screen 4 times. Turn right, and get the valve from the floor.

Endgame:
- Put all 4 limbs by the statue over the door in the main entrance scene. Put the valve in the hole over the door, and click on it to turn it.
- Click on the hole in the ground to enter it. Continue going down, and drop down through the hole in the end.

This is optional steps that doesn't affect gameplay.
Starting scene:
- Push the headphones.
- Zoom in on the chalkboard, and get the leftmost crayon. Use it on the spot in the middle right of the chalkboard.

Bed scene:
- Get and read the notes on the bed, and the one under it.
- Open the top drawer and get the pristine nail. Use it on the wall behind the alien.
- Push the game controller in the lower left.
- Use the knife on the piggy bank.

Main entrance scene:
- Push the button in the middle right.

Junkyard scene:
- 731 (A coordinate for SNEE(Another Mateusz game))
- Put the knife in any coin slot after getting the coin.
- A lot of levers and game controllers to push.
- Zoom in on the screen in the middle right.